The items on this page reflect my preferences for baking tools and ingredients; most of the links take you to Amazon for more information. These are purely my choices; no company has sponsored any of these recommendations or sent me any products to try. Also, if you buy something from one of the Amazon links, I make no money from it. Look around the web — you may well find better prices elsewhere. — Sharon
Essential Tools
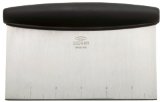
Bench Knife
A bench knife is a piece of stainless steel that generally measures about 4×6 inches. You can live without one, but life is so much easier with, as it lets you easily divide pounds of dough, cut up butter, slice cinnamon rolls, scrape your work surface clean, and transfer cut-out cookie dough to a sheet pan.

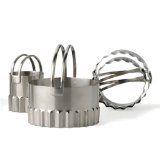
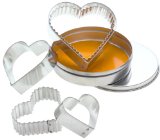
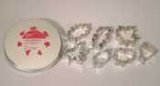
Biscuit and cookie cutters
Gadget nuts, look out: You can truly get happy amassing an incredible collection of cutters. Most-used in my kitchen are a nested set of three fluted rounds, a nested set of hearts, and, far less often, a set of small leaves. I also often use a 1-inch round cutter for small cookies, cutouts and doughnut holes. Try to get stainless sets that won’t rust, and don’t bother with plastic cutters.
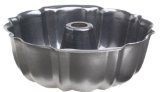
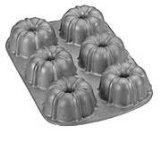
Bundt pans
These fluted tube pans get a heavy workout in my kitchen; I’ve owned both heavy-duty ones and lightweight supermarket ones and don’t have a strong preference for either; they have all worked well. The only one I’ve struggled with has an intricate pattern (not the usual Bundt ridges) in which I always seem to miss a spot when I grease it.
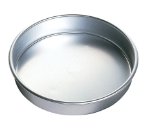
Cake pans
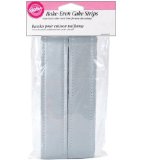
Two 9-inch pans will get the most use in your kitchen; you may also like to own some 8-inch and 10-inch pans. I especially like air-cushioned pans, which keep the cake from forming a center dome that needs to be cut off, but haven’t been able to find any lately. In lieu of that, using cake strips
around the edge of the pan will help moderate the heat to avoid the dome.
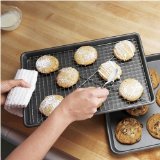
Cooling Racks
Look for racks that can go in the dishwasher and have a full grid, not just parallel wires, so food doesn’t fall through. Cooling racks let air circulate around your food as it cools, so it doesn’t steam. I also use them when frying, setting the racks over a half-sheet pan lined with paper towels, to drain the food as it comes out of the fryer.
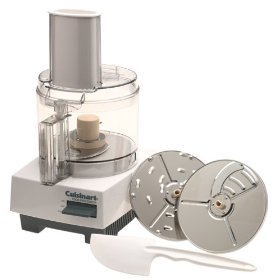
Food processors
I must be a kitchen wimp, because the idea of living in the days before stand mixers and Cuisinarts fills me with horror. Look carefully at the descriptions of the processors to be sure what size will suit you best. (I have a 7-cup one and a 14-cup, but I prefer the 7-cup for its feed tube, which I find much easier to use.) Mini food processors are OK if you have the space, but I never replaced mine when it died and rarely miss it.
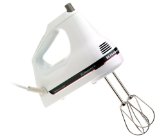

Hand and stand mixers
You’ll get the sense from anyone who loves to bake that a stand mixer is essential. It isn’t — but that’s a close call. I use my hand mixer for small batches (you can’t, for example, do a good job of whipping a cup of cream in the big bowl of a stand mixer), but it usually stays in the drawer, whereas the stand mixer gets daily use. I prefer KitchenAid mixers (for both hand and stand mixers), especially the stand mixers with a head that slides up and down, rather than tilting back. It’s also worth it to buy a second bowl and beater if you bake in large quantities.
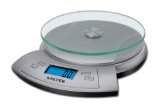
Kitchen Scale
Not essential in the United States, but it should be: If only we consistently measured by weight, our baking would be so much more consistent. Get a scale that holds at least 7 pounds; if you’re using a recipe with weight measurements, put the mixing bowl on the scale, tare out the weight, add the flour, hit tare, and add the next ingredient, and so on. So easy, so accurate.


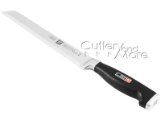
Knives
Get good-quality knives that feel balanced and sized just right for your hands. For me, this means Henckels, but Wusthof knives are also terrific. A paring knife, long bread/serrated knife, and chef’s knife will come in handiest in the baker’s kitchen.
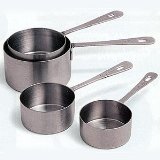
Measuring Cups For dry ingredients, use these stainless ones.
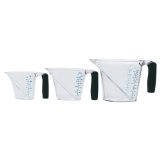
“Dry ingredients” includes the obvious — flour, sugar, chocolate chips, oatmeal, and the less so — peanut butter, sour cream. For wevt ingredients
(such as water, milk, cream, oil and eggs), these angled plastic ones are good if you’d like to see the measurement from above. Pyrex (glass) ones or plastic ones from a restaurant supply store also work well as long as you get at eye level with the markings on the side to be sure you’ve measured correctly. You can measure wet ingredients in the stainless cups, but don’t measure dry ingredients in the wet measuring cups — you can’t get an accurate measure that way.
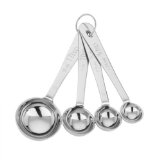
Measuring Spoons
I like heavy-duty stainless ones that won’t warp.
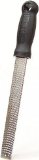
Microplane Zester
Ah, my Microplane: I love it so. Before getting one, I tried to avoid recipes that required me to zest a lemon (that is, grate the outer skin), despite my lemon addiction. The Microplane makes it quick, without skinned knuckles, and gives a finely grated zest just right for delicate desserts.
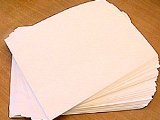
Parchment Paper
If you do a lot of baking, buy parchment paper in bulk. I use it to line all my sheet pans (whether a recipe says to use a greased pan or not). I also roll out sticky doughs on it, and use it under pizza and bread dough that I’m sliding from my peel to baking stones. The parchment may darken but won’t burn, and after the pizza or bread is set, you can slide it off the parchment for the last minutes of baking if you like. It’s a nice way to avoid using cornmeal or semolina under the dough, which tend to burn on the stone. Re-use the sheets until they get too brittle or messy, and try to buy sheets, not rolls — easier to work with when the ends aren’t curling up on you. You can also buy parchment rounds for cake pans if you don’t want to cut sheets to fit, but check the price to be sure the rounds are worth the convenience.
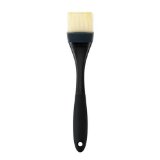
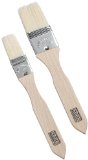
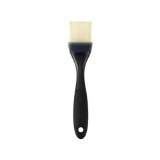
Pastry brushes
I have gone almost exclusively to silicone brushes, because they wash easily in the dishwasher and don’t leave icky bristles behind in my food. Having said that, there are still times I use a natural-bristle brush, because the bristles are stiffer than silicone and easier to control.
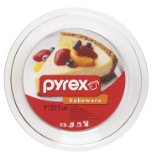
Pie Plates
I use 9-inch Pyrex (glass) plates almost exclusively, though I own a few pottery plates that also work well. I especially like being able to check how done the bottom of my crust is with a glass plate.
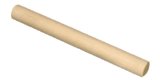
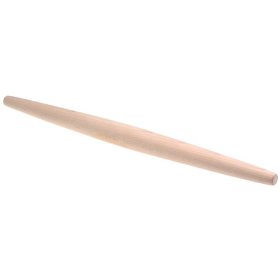
Rolling Pin
I prefer wooden rolling pins with no handles, to get more control over the pressure I put on a dough. My standard pin, which my father made for me, is 2 inches in diameter and 18 inches long. He also made me a French-style pin, which tapers at the ends to 1 inch in diameter and works well for rolling out circles (I keep one hand pressing lightly on the center of the pin while I roll in a circular motion with the tapered end).
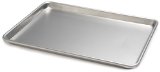
Sheet Pan
For all my baking, I use half-sheet pans from restaurant supply stores; these pans have a lip all around the edge. You may prefer to own a few sheets without a lip, but for the few times I need that, I just flip a sheet pan upside-down.
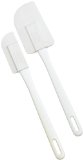
Spatulas
I get choosy when it comes to rubber spatulas; too many stores sell floppy ones. I like mine fairly stiff and find the best choices at restaurant supply stores. I also like silicone spatulas
for their ability to stand high heat, but these are often too stiff when you need to fold ingredients gently.
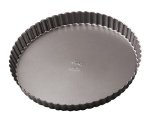

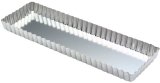
Tart pans
9-inch and 10-inch round pans will get the most use, but it’s also nice to own an oblong pan for puff pastry tarts. I have owned both regular and nonstick pans and don’t find much difference in the two, although the removable base of the nonstick pan often comes in handy for moving cake rounds. Four-inch, removable-bottom tartlet pans are an indulgence, but everyone loves an individual dessert, and these make beautiful ones easy. Use the base of one to slide a dessert off another.
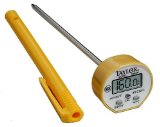
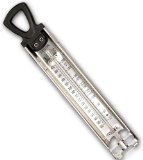
Thermometers
An instant-read thermometer helps both in baking and cooking; a candy thermometer will get less use, but takes the guesswork out of frying, candy making, and anything with cooked sugar.
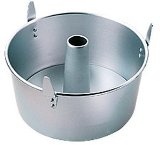
Tube pans
Look for tube pans, used for angel food cakes and coffeecakes, that have “feet” to elevate them from your counter so the cake can cool (pans without feet must be suspended from a wine bottle or some such — possible, but not always a fun trick). I prefer pans that aren’t nonstick, as I worry that may interfere with my batter’s ability to climb the walls of the pan and rise as high as possible.
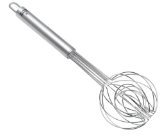
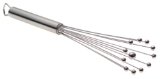
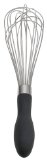
Whisks
You could spend days buying whisks and still not cover all the options. I keep my supply pretty simple, with a few balloon whisks that get used most for whisking dry ingredients together and for whisking egg whites when I’m making a Swiss meringue. My most beloved whisks came in a set of three from Ikea; their flat bottoms work wonders when I’m whisking something on the stove, thoroughly covering the bottom of the pan and the corners. (Ikea no longer sells the set of three sizes, but this is still a good set, and a terrific price.)
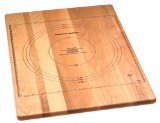
Work Surface
If you don’t want to roll directly on your counter (I keep mine clean, but I still prefer a board), use the largest plastic or wooden cutting board you can find and fit. My father made a wooden one for me that I adore; I wipe it periodically with mineral oil.
Fun Stuff
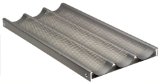
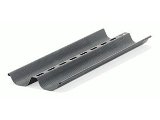
Baguette pans
Perforated baguette pans take away the need to support your rising loaves with a canvas couche, a romantic touch that’s still a bother.
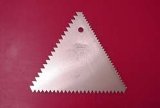
Cake decorating comb
When you need a super-quick way to decorate a cake, drag a decorating comb gently through the frosting.
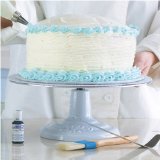
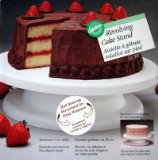
Cake turntable
The heavy metal turntables are wonderful, but even the lightweight plastic ones work well for basic cakes. Turntables make your work infinitely easier, allowing you to keep turning the cake with one hand while piping or spreading frosting with the other for a smooth finish.
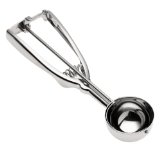
Cookie Scoops
Another tool that makes baking quicker, more fun, and more professional. These look like small ice cream scoops and come in various sizes; I own three, for making very small cookies,
medium cookies
or mini muffins, and an approximately 4-tablespoon size
for scooping full-size muffins.
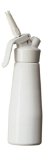
Cream Whipper
Of course freshly made whipped cream is easy and delicious … but this is a great party trick. Just pour in up to 2 cups of cream, add a bit of powdered sugar and vanilla as you like (or cocoa or other flavorings), shake it, add the cartridge
, and in one whoosh! you have whipped cream. There are some desserts I don’t like it for, as it makes a stiffly whipped cream. On the other hand, it does let you keep whipped cream fresh longer in the fridge.

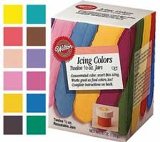
Food colors
Avoid the liquid food color at the supermarket and buy paste or gel colors instead, which will not affect the texture of buttercream or other icings. To use a paste color that doesn’t come in a squeeze bottle, dip a toothpick in, then swirl the color on the end of the toothpick into your icing, always dipping a clean toothpick into the paste to avoid contamination.

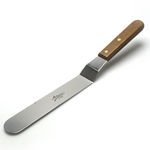
Offset spatula
Use these for spreading frosting on cakes or icing on cookies, or to move baked goods from pan to plate. I own a small one for cookies and any tricky spots on a cake, and two larger ones for spreading frosting smoothly on the top and sides of a cake. (When frosting the side of a cake, hold the spatula so the top of it faces the cake; frost the top of the cake with the bottom of the spatula.)
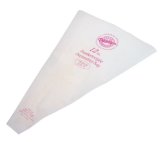
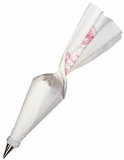
Pastry bags
Of all the bags I’ve used, I like these best: I turn them inside out and wash them on the top rack of the dishwasher, so they get thoroughly degreased (pastry bags that don’t get this treatment, even if you think you washed them well, quickly turn rancid). It can also be nice to keep a supply of disposable bags on hand. In a pinch, a zip-top plastic bag with a corner snipped off also works surprisingly well.
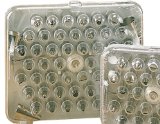
Pastry tips
For basic writing and piping, you need only a few tips (a small round one for writing, a star one, and a flower one), but buying a set will save you money. Having several sizes of round tips for writing and piping pearls, several sizes of star and flower tips, and a few fun ones such as the grass/hair tip and basketweave tips opens up the possibilities for even the most basic decorating. Stainless steel tips are best, stored in a tip case to keep them from getting bent.
Pizza stone Skip the pricey stones in restaurant supply shops. Instead, measure your oven racks, then go to a building-supply store (Lowe’s, Home Depot), and buy Mexican unglazed quarry tiles. Get enough to cover your racks with about an inch free on the edge, so air can circulate. Wash them well; I do use soap the first time, because it seems too icky not to, but after that, just rinse them well with water if they get messy, so they don’t transfer any soap flavor to your bread (never use cold water on a hot stone or it will crack). To better mimic a pizza oven, line both your top rack and bottom with the tiles and bake on the bottom rack. For other types of baking, leave the top rack free; you can leave the tiles on the bottom rack all the time if you like, but if you bake cookies on them, keep an eye on their undersides in case they get too dark.
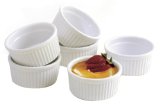
Ramekins
Porcelain ramekins for individual desserts, such as panna cotta or baby cakes, also come in handy for holding small amounts of ingredients as you set up your workspace.
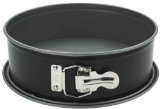
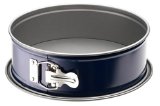
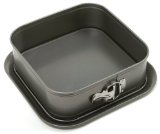
Springform pans
These removable-bottom pans make easy work of cheesecakes, coffeecakes and mousse cakes; just be sure to treat them gently so they don’t warp. (If you can afford it, heavy-duty is definitely better.) Always open the side hinge with the pan on the counter — never holding it up in the air.
Ingredients
Chocolate Cheap or not? And, chips or not? The choices are endless, and often expensive. For everyday baking, Nestle’s
semisweet chips work just fine. If you can find Guittard chips, go for it — I’ve been impressed with them. I find Ghirardelli
ones waxier, but many people love them. For recipes where you really need the chocolate flavor to shine, and want a more sophisticated one, it’s worth it to spend a bit more and use bars, not chips. My favorites for flavor without a big price tag come from Trader Joe’s. Their “pound plus” bars are a bargain, and they’re relatively easy to chop, to boot.
Coarse Salt
I use coarse (kosher) salt almost exclusively in my baking, mainly because I like the taste, and because it’s what I use for cooking (its larger size crystals make it easy to pick up a pinch or two and know just what I’m getting). It doesn’t dissolve as well as table salt, and not all coarse salt is created equal, so not all bakers like to use it. As a general rule, use 1/3 more coarse salt than the table salt called for in a recipe.
Instant Yeast
I use instant yeast exclusively, as I can count on it to work (no proofing needed as in older recipes calling for a packet of active dry yeast), mix in it directly with my dry ingredients or dissolve it in liquid, and expose it to a wider range of temperatures than active dry yeast.
Powdered Egg Whites
Use these for meringues that won’t get cooked, if you’re worried about the safety of your eggs (I like them in chocolate mousse). Be sure to use warm water to reconstitute them, or they take forever to dissolve and get too frothy in the process.
Southern Flour For much of my baking, I use unbleached, all-purpose flour; I especially like that from King Arthur’s Baking Company. But when I want an especially tender result, I turn to my bin of Southern flour. This is flour milled from a lower-protein wheat, perfect for biscuits, scones, pie dough, and, in a pinch, as a substitute for cake flour. Look for White Lily or Martha White brands.
Cookbooks
Sharon’s books
These are both on baking with herbs: Desserts from an Herb Garden
, and Morning Glories
, which covers herbs in breakfast and brunch.
